Teriyaki Salmon with Mango Slaw and Let’s Just Admit I’m Not Very Good at Blogging

So, as established in my last post, the world went incredibly haywire in the past 6 weeks, which has certainly contributed to my lack of posting. But I’ve literally posted 3 times this year (this will be blog post #4), and that can’t all be blamed on coronavirus panic. No, much of that must be blamed on my time management and on grad school itself.

Here’s the thing: I, for reasons that I barely comprehend myself, agreed to TA two different classes this semester. Together they add up to a normal amount of hours of TA appointment, but they have very different requirements and deadlines for me to keep track of. As a result, it feels like I am literally always grading something, and asking myself questions like, “why did I do this” and “do people not use spellcheck”.

Image result for grading teacher gif
Source: Giphy

Meanwhile, I am working on my prospectus, which means I am desperately trying to take the mess of ideas in my head and put them on paper in a way that is a) coherent and b) plausible as three connected papers. This is harder than I thought, which I know may seem silly, but I’ve literally been cultivating this plan for years, and I figured, oh, how hard can it be to just write it all on paper and then my advisor will give me some edits and I’ll be fine?

Nope.

Image result for narrarator not fine gif
Source: i.pinimg.com

Okay, so, that is my excuse/explanation for the current state of things. Yes? Good? Now let’s talk about food.

I only started eating salmon a few months ago, but this is not my first salmon recipe I’m posting here, because it’s a great medium for a lot of flavors, and is really good for you.  This recipe was inspired by far too many hours watching Hell’s Kitchen, which I have had on in the background because honestly it’s good to watch other people have meltdowns about things and remember I’m not alone.

Image result for hell's kitchen gif
Source: Giphy; Hell’s Kitchen Season: unknown

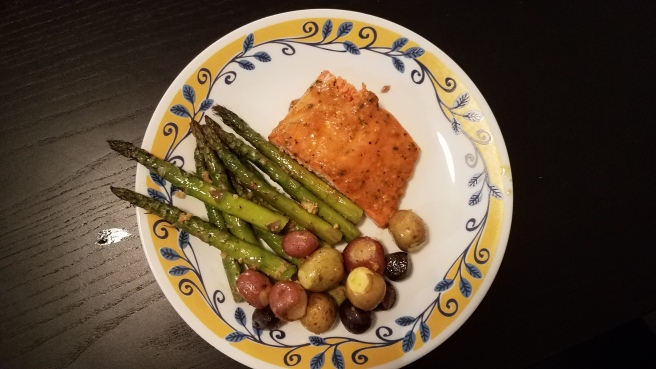
SO THIS SALMON.  I know, I know, you thought at the very least the next image would be of the salmon. Sorry. I get distracted, you know? But here it is, the Teriyaki Salmon with Mango Slaw you have presumably hung in there with this post to see:

IMG_20200309_201219

Look at that! It’s colorful, flavorful, and is totally on point for spring!

This dish is actually really simple, which is the good news. You can use thawed frozen salmon for this, which is the better news. I have no idea what the produce dept looks like at your local grocery store and cannot predict whether or not you have access to cabbage or mangoes, which is the bad news. BUT if you can get your hands on the handful of ingredients involved in this recipe, a tasty dinner is in your future.

IMG_20200309_201216

You can do this with store bought teriyaki sauce (like I did), or you can make your own. The mango slaw is based on this recipe, but with a few minor adjustments.

IMG_20200309_201221

INGREDIENTS

For the salmon:

  • 2 cuts of Atlantic or Alaskan Sockeye salmon
  • Approximately 1/2 cup of teriyaki sauce

For the slaw:

  • 1 cup of shredded cabbage or Cole slaw mix
  • 1/2 to 3/4 of a mango, ripe, cut into bite-size pieces/strips
  • 2 scallions, green parts only, sliced vertically and then into strips
  • 2 T rice vinegar
  • 1/2 lime, juiced, OR 1 1/2 T lime juice, store bought
  • 2 tsp low sodium soy sauce
  • 1 1/2 tsp sesame oil
  • 1/2 tsp chili powder
  • 1/2 tsp lemon pepper OR zest of 1/3 lemon

INSTRUCTIONS

  1. Put the salmon and teriyaki sauce in a quart or gallon size bag and let it marinate for at least 15 minutes, or up to a day in the fridge
  2. Preheat the oven to 450
  3. Combine all of the slaw ingredients together (this can also be done up to 4 hours in advance to let the flavors meld, but needs to be allowed to sit for at least 20-30 minutes)
  4. Cook the salmon on a sheet pan for 12-15 minutes, until fully cooked through
  5. Transfer to a plate and top with the mango slaw

Love ( ,Food, and Grad School) in the Time of COVID-19

I was behind on updating this blog, with posts half-finished, for months.

And then the world came derailed.

Like many of you, I saw any number of threads of my life start to unspool at the start of the COVID-19 pandemic. Like many of you, I have been told to work remotely (which is difficult because of what I study, and also because teaching online classes when you’re not trained to do so is a sure way to get a bad headache), and am practicing social distancing by basically not seeing my friends in-person, going to my weekly sports league (also put on hold), and staying in my apartment with my dog as much as I can. (I am, however, rapidly catching up on the TV on my watch list.) A project I’ve worked hard to prepare to put in the field likely has to be put on hold because I can’t do community-based recruitment right now.

I know this is hard. Not being able to see other people is really, really hard, and public health experts are saying we will need to maintain social distancing measures for a minimum of 6 weeks, and very likely the time scale will range from several months up to a year or more. At some point, we will have to start balancing social distancing with our need to have our lives back, but for now, we need to make things work in our current situations. We all need to work together to flatten the curve, and the best way we can do that is by following the guidelines for social distancing to minimize the spread of the virus as much as possible.

FOOD

I’m sure you’ve already been told to make sure that you have enough shelf-stable/freezer-stable food to last up to 2 weeks, in case you have to self-quarantine or self-isolate.  If you are able to find them, I encourage you to consider looking at ways to use various kinds of beans, lentils, and dried peas. Tofu is fridge-stable for up to 6 weeks, and many meats can be frozen (I’m a particular fan of frozen fish).  We’ll deal with that later, though, because right now, supermarkets around the country are a disaster.

Image result for supermarkets after covid 19 panic
Source: ABC News

If you are suddenly going to be home a lot more than often, you are likely to be snacking more than usual. So as much as it is possible, make sure you have healthy snacks on hand, like fresh fruit (apples, pears, kiwis, oranges, and grapefruits are all in season right now, and mangoes, blueberries, and strawberries are all coming into season!), snack-able veggies like carrots, celery, and sugar snap peas. Consider pairing them with peanut butter or hummus to add a little extra flavor and protein. If you can get them, cheese and crackers, peanut butter crackers, or granola bars can all be good snacks. For more ideas, check out my previous piece On Snacking.

LOVE (Romantic and Platonic)

If you’re like me, and you’re single (and therefore not hunkered down with your significant other), this is particularly frustrating. My generation has kind of forgotten how to date: apps have made connections instantaneous and have allowed us to not really put effort into building them if they do not have immediate/short-term rewards. For better or for worse, people have kind of forgotten how to make organic connections with people and nurture them into relationships; in fact, people sometimes think it’s kind of weird when I say that I have met none of the guys I dated on apps (unless you count the guy I met in an Uber Pool, in which case, ok, I met him on an app but Uber isn’t really meant to be a dating app!).  Right now, though, we won’t be going around in rideshares or chatting people up at bars, or meeting them at parties hosted by mutual friends; we’ll still be reliant on apps, and how we will use them is going to have to change.

coronavirus dating apps tweet

Now, if you are thinking, girl, this is supposed to be a food blog, a) look at the title of this post and b) I’M GETTING TO THAT! I was long distance with my now-former partner for a long time, and my sister and her bf are possibly the queen and king of long distance dates (in grad school in totally different parts of the country), and we’ve both lived far away from some of our closest friends & each other (bc of college/grad school/work), so I figured I’d share some (food related) ideas for connecting with friends or dating partners (or prospective dating partners, I guess):

  • Order takeout together–from the same place, or from different places, and eat it over video chat. My sister and her boyfriend even order each other stuff and arrange to have it delivered at the same time, but don’t tell the other where it’s coming from or what it is-~-it’s a total surprise!
  • Cook a recipe together over video chat (another pro tip from my sister and her bf)
  • Just eat together! Planning a meal with friends can help reduce your sense of social isolation even while practicing “social distancing”. Eat whatever you were going to be eating, or have a cup of coffee, over video chat. Studies show that eating with others is better for your mental health, and helps you eat more, which can be really important since stress often messes with our appetites.
  • Watch movies or shows together while texting/messaging. I personally really like doing this with Disney movies (because they’re easy to follow even if you have to glance away) and competition shows, like the Great British Bake-Off or Top Chef, since you’ll start rooting for (and against) contestants

GRAD SCHOOL

Okay, first thing’s first: you need to cut yourself some slack.

Image result for take a break gif
Source: Giphy

Look, expecting yourself to perform at your usual level of productivity may not be reasonable right now. There’s a pandemic going on that they say is going to disrupt our lives and our work for 12-18 months, most likely. It’ll change important aspects of work, social life, and health behavior, and honestly I would not be too surprised if it resulted in some pretty notable social and economic changes (e.g. universal basic income, paid sick leave, paid family/medical leave, greater access to jobs for people with disabilities, and a re-conceptualizing of the internet as a public good). Many of us will have to hold off on things we were really looking forward to, such as travel, conferences, etc. You may have family or friends who are sick, or get sick yourself, and the anticipatory stress of this is going to make things really difficult. Many of us are now home with family members, roommates, significant others, and/or pets; for parenting grad students, trying to produce at the usual level may well be impossible while providing childcare and homeschooling supervision. We can’t just pretend this is business as usual, just from our homes instead of our offices, when it very definitely is not.

Image result for working gif
Source: Giphy

Eventually, we will find a middle ground that allows people to go back to work when and in ways in which it is safe. But in the meantime, it’s okay to realize that you’re not going to suddenly start cranking out papers and grant proposals from your living room.  You’ll also need to develop new routines, find ways to hold yourself accountable, and balance your work goals with all of the other things you are dealing with. Here is some great advice I have collected from friends who do work from home, or have done so previously:

  • Don’t do work from bed. Choose one or more spaces in your home where you do work, and just work from there. For me, it is my dining table and my desk (and sometimes I do grade on the couch with the TV on).
  • Squishy surfaces like couches, beds, and arm chairs encourage/facilitate slouching and offer much less back support when you’re sitting, so even if you feel like you want to be sitting on them, try to limit the amount of time you spend on your sofa, for the sake of your lower back. It may not be super easy to get a chiropractor appointment for a while.
  • Put on music or something minimally distracting on TV (e.g. something you’re not invested in, or something you’ve seen a zillion times before and therefore don’t need to pay close attention). Sometimes working from home can be *too* quiet, which can be distracting in its own way. There are lots of great ambient noise albums and such online and on Spotify, as well.
  • Get dressed. It doesn’t have to be what you’d wear to the office/to class, but even if it’s athleisure, change out of your pajamas and into actual clothes, to help your brain be clear that you are starting your productive hours.
  • Set productive hours! If you’re a grad student, I highly recommend setting aside several hours a week to exclusively work on research/writing projects whether you are working from home or working on campus or some combination thereof (and by “I highly recommend”, I mean my advisor and the author of How To Write a Lot recommend and I adhere to their advice). If you already have those hours, KEEP THEM! Do not sacrifice the hours you already set aside for writing, since it’ll help you maintain some semblance of your normal routine. Decide at what time you’ll start working and, maybe even more importantly, what time you’ll stop. Working from home can blur the boundaries of work life/home life, but those boundaries are still needed.
  • Take breaks! When you’re at work/at school, you probably don’t work nonstop for hours on end, right? You get up, walk around, stretch, get coffee. Do those things! They help your productivity, sure, but they’re also just good for you.
  • Say no to things. Working from home means people assume you have lots of extra time, sometimes. It’s okay to say that you can’t take something on right now, or that you have to pass on something. It’s okay to set and maintain those boundaries.
  • Eat lunch! You still have to eat, and just because you’re working from home doesn’t mean you need to eat through lunch. Take a break while you eat and watch an episode of something, or read a book for fun, or call/video chat with a friend.


BACK TO FOOD

I hope at least some of those tips will help you!! In the meantime, I wanted to leave you all with some recipes/resources for cooking during this crisis. For me, this has really challenged how I approach meal planning and cooking, because there are still a lot of ingredients not available in stores, including key vegetables I need (which makes no sense to me; if you weren’t eating swiss chard before this, why are you suddenly buying it now??), which means I’m having to improvise my plans while I’m at the grocery store based on what is there. For some, now is a great time to consider batch cooking, especially if you can freeze some of it for later. It may be a great opportunity to prepare things ahead of time, freeze them, and throw them in your slow cooker. Or you may be in need of some simpler recipes based more around shelf-stable goods. Either way, here are some recipes and resources that may be of help:

Made it Through Comps, and I’m Back in the Kitchen w/ Eggplant Parm Pasta

If you haven’t been through a PhD program or don’t/didn’t have friends with whom you were friends while they went through a PhD program, you may not be familiar with the obnoxious ritual known as comps.

Comps=comprehensive exams.  For better or for worse, almost every field requires an exam or a portfolio at some point in the first few years of graduate school to assess a potential PhD candidate’s general knowledge of the field.  They may be called comps, or quals/qualifying exams.  They may be administered at the university, or given as a take home exam.  They may require several hours, or several hours over a few days, or even weeks to complete.  But they are, universally, one of the most hated milestones of graduate school.

All of that is to say that my comprehensive exams were this month, and as a result, I haven’t been posting on the blog.  I haven’t even really been cooking that much, if I’m being honest, which means I had nothing to post on here.  I’m not proud of it, but I let my diet become a mess in the final weeks leading up to the exams.  I ate takeout or microwaved frozen Indian food from Trader Joe’s or at simple meals like eggs, toast, and salad, and for the most part, I just tried to put one foot in front of the other and be done with the stupid exams.  But now they’re over (assuming I passed), which means I am free to have a life again.  And I can actually make sure that I cook, and eat better, more balanced meals, and that I go to the gym more and do other things that I have been neglecting. (My car really, really needs to be washed! Plus, I think the dog needs a haircut.)

It’s fall, so I decided to lean into the warm, cozy comfort food vibe with an Eggplant Parm Pasta Skillet.  This dish is, in my opinion, so much better than traditional Eggplant Parmesan. For starters, the pasta is built right into the dish, so you don’t need to make it as a side; plus, the dish is made extra nutritious through some stealthy spinach added in.  As a bonus, there’s no breading and frying-~-you know, the two things that normally make Eggplant Parm taste great but also be a lot less healthy than a vegetable dish should be?  This solves that problem.  The recipe comes from Cook Nourish Bliss, and has been a favorite in my apt for the last couple of years.  Plus, with pasta and cheese, it hit the right comfort food notes for me to be motivated to make it in the lead-up to my exams.

20181209_195319

Don’t you just already feel cozier just looking at that??

Now, there is one kind of funky thing with this recipe.  The first time I ever made this, I was really thrown off, and the reason is this: you do not pre-cook the pasta.

Let me repeat: do not pre-cook the pasta.

20181209_192749

As seen in the photo above, you will actually cook the pasta directly in the tomato sauce, canned tomatoes, and broth.  This lets all that great flavor get into the pasta a bit as it cooks, and helps keep this a true one-pot meal.  Once you have cooked and removed your veggies from the pot, you’ll add in these ingredients, partially cover, and simmer until the pasta is al dente.  Like I said, it totally threw me off, but it’s actually pretty brilliant.  And it yields such deliciousness.

20181209_195321.jpg

Here is the recipe, copied over from Cook Nourish Bliss:

INGREDIENTS

  •  2 ½ tablespoons olive oil
  •  1 medium onion, chopped
  •  3 large cloves garlic, minced
  •  2 to 2 ¼ pounds eggplant, cut into ½ inch cubes
  •  ½ teaspoon salt
  •  ¼ to ½ teaspoon red pepper flakes
  •  1 (5 ounce) bag fresh baby spinach leaves
  •  1 (14.5 ounce) can fire-roasted diced tomatoes
  •  1 (8 ounce) can tomato sauce
  •  1 ½ cups low sodium vegetable broth
  •  8 ounces uncooked whole wheat penne pasta
  •  1 ¼ cups shredded mozzarella cheese
  •  ¼ cup shredded parmesan cheese
  •  plenty of chopped fresh basil, for garnish

INSTRUCTIONS

  1. Add the olive oil to a large (deeper style) nonstick skillet set over medium heat. When hot, add in the onion and cook for about 2 minutes, until it starts to soften. Add in the garlic and cook for 30 seconds, until fragrant. Add in the eggplant, salt and red pepper flakes. Cook, stirring occasionally, until tender, about 7 to 8 minutes. Add in the spinach and cook until wilted. Remove all the veggies to a medium bowl and set aside.
  2. To the now empty skillet, add the diced tomatoes, tomato sauce, broth and pasta. Mix to combine. Bring the liquid just to a boil, then cover, reduce the heat and simmer fairly vigorously for about 11 to 13 minutes, stirring occasionally (and more frequently toward the end of the cooking time), until the pasta is al dente and almost all of the liquid is absorbed.
  3. Reduce the heat to low. Add the eggplant mixture back into the skillet and mix to combine. Sprinkle the top with the mozzarella and parmesan cheese. Recover and continue to cook for about 3 to 5 minutes, until the cheese is melted. Turn off the heat. Let the pasta stand for about 5 minutes, then garnish with the fresh basil. Season with additional salt / red pepper flakes as needed.

Enjoy!!


How to Deal with Food When You Don’t Really Want to Eat

Note: THIS IS NOT A POST ABOUT COOKING. Not really. There is no secret recipe lurking towards the bottom. If you are in this just for the food, I totally respect that, and you should check back soon. This post is about understanding your core foods, your “safe” foods, if you will, for when your body doesn’t seem to really want anything.

CW: Eating Disorders. I don’t have an eating disorder, but again, this post is about dealing with having no appetite/desire to eat.

I have been meaning to post recipes, wanting to post recipes, on here for weeks. I had all these ideas about what I was going to cook and share with y’all. But I kept running into the same problem, over and over:

I didn’t really want to cook. And there was nothing I really wanted to eat.

It wasn’t that I was trying not to eat. I wanted to want to eat. But when mealtime rolled around, I wasn’t hungry. I could maybe get myself to eat, but not the kinds of foods I usually make. The foods I usually make use combinations of flavors and textures that make for a more complex (and usually, more delightful) food experience for me. But I couldn’t do it.

On top of that, I didn’t really want to cook. This is extra surprising for me because I love cooking. Cooking is stress relief for me. It gives me a chance to step away from schoolwork and just focus on this very important aspect of my self care. But I’ve been stressed (and probably a little depressed) and unmotivated-~-which, again, is very common in grad school.

Image result for hyperbole and a half
Source: Hyperbole and a Half

And this is not something that could be solved with cheese and a little food pampering. Believe me, I tried. I have tried wielding cheese in several forms to motivate myself (nachos, quesadillas, apples and cheddar, brie and crackers) and nothing has worked.

I’ve been through this before, though. And I know that it will, eventually, pass. And in the meantime, the strategy is basically this: identify the foods my body is on board with even when it thinks it isn’t hungry.

Have you ever done this? If not, it’s actually not a bad thought exercise. Which foods bring you joy? Which foods bring you comfort? Which do you not actually need any motivation or appetite to eat because they’re just kind of there and your body will accept them? What forms of foods work for you in these situations?

For me, it basically comes down to a few staples:

  1. Pasta. It’s good, it’s reliable, and it is very easy to prepare. Even when I’m really out of it, I still try to stick to me 2 food group minimum, so I’ll often try to add in a vegetable; for me, sauteed broccoli often works, or blanching asparagus and adding it to pasta Alfredo is often an easy option.
  2. Fried rice. Preferably from the local Chinese takeout place, but I can make it myself. Veggie fried rice or chicken fried rice are usually easy go-to meals, and they offer at least a few food groups to help with the whole “nutritional balance” thing.
  3. Green smoothies are a super easy way to get veggies into my system even when I don’t really want to eat the veggies. (Also, they are honestly one of the only ways I will consume kale, because I really do not like kale.)
  4. YOGURT. Yogurt is honestly the true MVP of my grad school experience so far. Every time we adjust my anxiety meds, my appetite gets messed up, and yogurt becomes a critical source of nutrition for 1-3 weeks at a time. It requires basically no appetite, and it has protein, calcium, and vitamin D. I’ll be real with you: get the good yogurt. At least reduced fat, preferably whole fat, Greek or Icelandic yogurt. Nonfat yogurt has a lot of hidden sugar. Seriously, go check.
  5. Protein shakes-~-a life saver
  6. Salads are a good way for me to get at least some vegetables, without getting overwhelmed. The trick, for me, is to not have an overly fancy salad; instead, I like to get a shaved veggie “slaw” (HEB calls it power slaw, the one I eat), pour a bunch of vinaigrette on it, and eat that.
  7. Waffles with peanut butter. They take almost no effort, they provide some protein and a starch, and I can follow them up with a fruit or veggie like carrots, strawberries, or bananas.
  8. Berries, cherries, or grapes-~-they are easy to snack on and require little motivation.

The other big trick for me is to switch to simpler meals when I meal plan. Fewer flavors overlapping and lower effort meals mean I’m a lot less likely to bail on cooking them or have trouble with them. Here are a few of my recommendations:

  1. These Brussels sprouts with eggs and bacon, with or without actually including the bacon
  2. This Parmesan crusted chicken with green beans that offers an easy, balanced meal; I sub in diced up potatoes for the tomatoes (I was never a big tomato fan and this way I get a starch and some potassium)
  3. This five ingredient chickpea curry, which is easy to make and usually sits well when I eat it
  4. This easy lemon chicken and asparagus–you can also just grill or pan-sear some chicken and saute some asparagus with lemon pepper and lemon juice and call it a day
  5. Hamburgers with green beans or sweet potato on the side
  6. Shakshuka, preferably with a veggie on the side (I like to eat mine over pita or naan)
  7. These zucchini fritters with hard-boiled or fried eggs
  8. These fruit and yogurt overnight oat parfaits, which I usually eat for breakfast.
  9. Macaroni and cheese, maybe with a side salad.
  10. This Sweet Potato and Black Bean hash, with or without the eggs

Honestly, this may not work for everyone. Maybe you need to default to favorite foods, no matter how “fancy” or complex they are.  Maybe you need to switch to more new recipes, to keep things interesting.  But the important thing is this: know what you are willing to cook and eat when you don’t particularly want to cook and eat, because no matter how stressed, depressed, anxious, or tired you are, you still need to meet your nutritional needs.


Smitten Kitchen’s Burrata and Lentils, and I am Feeling the Grad School Slog

Before I even started graduate school, I knew this: there would come a point when I would want to quit.

I knew this because almost everyone who goes through a PhD program thinks about quitting at some point-~-and, in fact, about 50% of doctoral students drop out of their graduate programs. The biggest reasons are time management problems, conflicts with supervisors, feeling burned out or exhausted, problems with writing up the dissertation, loss of interest in research, and feeling isolated. Graduate school comes with a particular brand of loneliness: you are working independently, all of your graduate school friends are also working independently and are as isolated and overworked as you, and your non-grad student friends may not understand what you’re dealing with, especially because graduate school is fundamentally different from college and the experience is frequently misunderstood.

I’m not even at the point where I want to quit. I genuinely do care about my master’s thesis and I genuinely like the topic I am developing for my dissertation. Thus far, (most of) my advisors have been helpful and supportive. But grad school has a way of making you feel incredibly not special. I am not saying that I need to actively feel special all the time. I am fine with that, actually. What I mean is that graduate school makes you feel actively not special. It’s the difference between not hearing something positive and actively hearing something negative. You are constantly hearing about how much you don’t know, and how incredibly bad your job prospects are, and how you need to be publishing more than ever, and how nothing you are working on is actually ready to go to a journal, and all of this is happening while you are being rejected for fellowships and rejected from journals and struggling to deal with low grad student stipends and graduation feels so freaking far away. And you don’t have to want to quit to recognize that you are exhausted, burned out, and frustrated.

Related image

By now, at least half of you have skipped ahead to get to the recipe and honestly, that’s fine, that is totally fair. But if you haven’t skipped ahead and have stuck with me through this little rant, let me say: if you are a doctoral student who is feeling this, you are not alone at all. What you are feeling is very, very common, and as one of my advisors pointed out, the feelings of frustration and dread will (probably) pass, so keep your eyes on the prize. Or, it is equally valid to quit if that is what you need to do for your mental health or your career.

All of that is to say that sometimes we do need to hear that we are special or at least just deserving of something good, even if we have to say it ourselves. And sometimes treating yourself to food that feels a little fancier is a good way to make yourself feel a little special, or a little better. At least, it does for me: it is a way for me to tell myself that I deserve fancy food (by which I almost always mean “fancier cheese”). And even if that isn’t how your brain works, this recipe involves burrata, which means it will for sure bring you joy.

If you are not familiar, burrata is a type of cheese that is like fresh mozzarella on the outside and creamy ricotta on the inside. It is a little more expensive, so bear in mind that you can use half a ball of burrata for each portion and stretch that cheese purchase a little more if you want.

20190324_193346

This recipe is super easy to pull off and makes a delicious and filling vegetarian meal. Just be sure to cook the lentils completely and to give yourself time to saute your onion and zucchini. 20190324_193303

RECIPE:

LENTILS
1 1/2 cups dried lentils de puy* or other small green lentils
1 tablespoon olive oil
2 medium zucchinis (about 6 ounces each), diced
1 small or 1/2 medium onion, diced
Leaves from 3 fresh sprigs thyme
2 small or 1 large garlic cloves, minced
Salt and freshly ground black pepper
BASIL VINAIGRETTE
1 1/4 cups fresh basil leaves
2 teaspoons smooth Dijon mustard, plus more to taste
1 tablespoon plus 2 teaspoons red or white wine vinegar
6 tablespoons olive oil
Salt and freshly ground black pepper

ASSEMBLY                                                                                                                                               2 large balls of burrata (or 4 smaller ones)**, at room temperature
Sea salt and more black pepper
A few small basil leaves for garnish

*Lentils de Puy are Deb Perelman’s recommendation, and I just want to second this because I had made this recipe before with regular green lentils and they just were not as good. Lentils de Puy hold their shape a lot better and have a different texture, and if you’re not sure if you like lentils, they are a great type to start with. You can usually find them in the grocery store (esp if you live near a nicer grocery store like a Central Market or a Whole Foods), or you can order them online.

**You can also opt to cut your large burrata balls in half in order to stretch the container so that it covers 4 servings since burrata isn’t cheap, but be sure to only cut them when you are ready to eat so that you don’t lose out on ricotta-like filling spilling out

The original recipe, complete with Deb Perelman’s advice and commentary, can be found here.

Lemon Dijon Salmon with Asparagus and Potatoes, and I’m Already Behind

WOW the end of break happened fast, didn’t it?! It’s only the first few days of February and I don’t know how that happened. I blinked and school had started and I had been super slow to actually post things to this blog. Sorry about that!

Related image
Source: reactiongifs.us

Anyway, I am back, I hope. I should stop over-promising and under-delivering on this blog, and I know that. I don’t do that with my advisor (at least, I try not to!) but somehow it’s so easy to always SAY I am going to post a bunch and then just…not. It’s partly that I forget. It’s partly that I forget the recipe for whatever I made that I wanted to post. And it’s partly this:

This week’s recipe I’m sharing is Lemon Dijon Salmon with Asparagus and Potatoes. It’s a balanced meal on a sheet pan, which makes it super convenient, and the sauce has got lots of flavor going on. It’s a twist on this recipe from No Spoon Needed, but with a little less lemon, a little more acidity in the sauce, and a few other tweaks, but credit where credit is due-~-this recipe is very, very close.

20190131_184228.jpg

I cannot recommend using meals like this enough: they are low-stress, and they require very little active effort. Plus, this is a balanced meal hitting all of your major food groups. So throw this in the oven and enjoy!

20190131_184439

RECIPE:

For the sauce:

2 T olive oil

2 T Dijon mustard

2 tsp apple cider vinegar

1/2 tsp lemon juice

1 tsp paprika

1 tsp chopped garlic

Salt and pepper, to taste

For the meal:

2 4-oz or 6-oz salmon fillets (I recommend sockeye salmon)

1 bunch asparagus, trimmed

2 cups small, preferably rainbow potatoes

1 tsp chopped garlic


Directions:

  1. Preheat oven to 425 degrees
  2. Combine all sauce ingredients in a bowl
  3. Place the potatoes along one edge of the pan. Drizzle with olive oil and sprinkle with salt and pepper. Roast for 10 minutes.
  4. Pull the pan from the oven. Arrange the asparagus near the potatoes, drizzle with olive oil, and sprinkle the potatoes and asparagus with chopped garlic. Place the salmon on the other side of the pan, and spread the sauce over it.
  5. Bake for 12-15 minutes until fish is cooked through (it should be flaking) and asparagus is fork-tender.


Mama’s Cranberry Muffins

Obviously the end of the semester got away from me, wow. I started writing this post WEEKS ago (as in, before Thanksgiving) but then got so caught up in end of semester work that it feels like everything else got put on a back burner and then caught fire.

this is fine GIF
Source: GIPHY

I probably don’t need to tell my fellow grad students why this happened. You already know. You know the feeling when suddenly you have 3 papers and two fellowship applications and two presentations all due in the same two week period (why? Why are fellowship applications due when finals are happening? Is it a test?), and you then have to hold office hours for students who are worried about their final, and then grade said final. I’m exhausted just recapping it. And that is JUST SCHOOL STUFF! There’s also all of the actual end-of-year-holiday-season-rapidly-approaching stuff!

grad school problems 1

All of that is to say that several weeks ago, I walked into my grocery store and was hit by this MUCH HAPPIER thought:

It’s muffin season, y’all!

No joke, my mother and I had, apparently, the exact same thought while at our respective grocery stores that week: it’s muffin season. What made it suddenly muffin season, you ask? Why did we both have this thought? The answer, friends, is cranberries.

Image result for cranberries
Source: NY Times

My mother and I are both very fond of cranberry muffins. If you have not yet eaten a cranberry muffin, then I am sorry, and that is going to need to be corrected, because they are great. The tartness of the cranberries contrasts super well with the sweetness of the muffin, and it is just delightful. When I was growing up, I loved these, and as an adult, I have probably asked my mom for the recipe no less than 10 times, because I can never remember where I wrote it down. It is currently written on a piece of lined paper and taped to the side of my fridge.

Coincidentally, Ana grew up on basically the same muffin recipe. We have no idea how it happened, but the first time I made these last year, she was shocked by how familiar the recipe seemed, and she called her mom to find out what their family recipe said, and BOOM: same recipe.

For the record, though, this recipe does not have to be made with cranberries. It can also be made with chocolate chips, or blueberries, or some combination of chocolate chips and cranberries (mmmmm, delicious). This is a great basic muffin recipe, and it can be adapted to your needs. But that being said, you should definitely try making it with cranberries, because cranberry muffins have become a family favorite for good reason.

INGREDIENTS

1 1/2 cup all-purpose flour

1/2 cup sugar

1 egg

1/2 cup milk

1/3 cup vegetable oil

1 tsp baking powder

pinch of salt

OPTIONAL: 3/4 cup cranberries (more if you really want them, though)

OPTIONAL: 1/4 cup white chocolate chips (these pair surprisingly well with the cranberries)

DIRECTIONS:

Beat the egg until it is foamy. Add the milk and the oil and combine.

Add all of the dry ingredients. Fold in with a rubber spatula until well combined but not overly smooth. Add the cranberries.

Bake at 350 degrees for 20-25 minutes.


Back To School and Breakfast Tacos

How is it already September??

Girly Grad Problems 1

So here I am, back at it, ready (ish) for Year 2 of grad school. (Don’t worry folks, I am a doctoral student, I have a lot of grad school left ahead of me). I would probably feel significantly more ready if I had accomplished literally any of my goals this summer, but alas, I did not, so now I am scrambling to get things done ahead of conference deadlines and catch up on a project I had meant to be done with. What comforts me here is know that many of my fellow academics are in the same boat, feeling all of the same feelings of shame, guilt, frustration, and just plain old panic.

shit academics say 1My point is that school has started, I already feel behind, and I have been weirdly bad about eating breakfast in the morning. But that’s where these breakfast tacos come in. They are delicious, simple, and you can batch cook them and put them in the freezer.

20180902_175143.jpg

What is in the breakfast tacos, you ask? All the breakfast taco essentials: scrambled eggs, cheese, and potatoes, plus some bell peppers and turkey bacon (100% option for my vegetarian folks out there!) for extra flavor and protein, all wrapped up in a (very small) flour tortilla.

20180902_174046

I’m not here to waste your time, folks; I am here to save you time. Take half an hour to whip up a batch of these breakfast tacos and stick them in your freezer, and breakfast is taken care of for several days. Live your best life and start your day with tacos so that even though the day ahead is stressful…there were tacos.

20180902_173807

That’s my new grad school strategy, summarized.

Two quick notes before I give you the actual recipe:

First, make sure your potatoes are good and fried. No one wants breakfast tacos filled with sad, under-cooked, still crunch potatoes. Get them softened and nice and golden-brown on the outside.

And second, make an assembly line directly on your aluminum foil to save time on cleanup.

20180902_174000

Here we go:

INGREDIENTS:

2 medium red potatoes, peeled and diced

1 bell pepper, chopped

2 or 3 slices of turkey bacon (OPTIONAL)

3 eggs

shredded cheese (cheddar jack or Mexican cheese blend)

9 small tortillas

1/4 tsp cumin

1/4 tsp coriander

1/2 tsp paprika

salt and pepper, to taste

DIRECTIONS

Coat a pan with olive oil or grapeseed oil and heat over medium heat. Add the diced potatoes and sauté for 7-9 minutes, until potatoes are softened and golden brown. Season with cumin, coriander and paprika. When about half the potatoes are golden brown, add in the bell peppers and sauté until potatoes are done and bell peppers are tender. Remove and set aside in a bowl.

Add a little more oil back into the pan. Crack your three eggs into the pan and scramble. Season with salt and pepper. Add to the bowl with the potatoes and peppers.

If you are adding turkey bacon, cook your turkey bacon according to package instructions/until desired crispiness and cut into small pieces. Add to the bowl with the potatoes and peppers.

Mix all of your filling ingredients together Lay out your tortillas in an assembly line style and add filling to the center of each. Top with shredded cheese.

Roll each taco like a mini burrito and wrap in aluminum foil. Eat immediately or freeze until you are ready to eat.

TO REHEAT: Unwrap from foil. Wrap breakfast taco in a damp paper towel and microwave for 1 minute.


Vegetarian Skillet Pot Pie, and a Trip on the Summer Struggle-bus

What I think maybe people don’t realize about academia is that summer is not really time off. Summer is flexible work time when you try to make serious progress on all the projects that kind of got neglected during the semester because you were in classes/teaching/mentoring/going to conferences/trying to meet deadlines, etc. Yes, academics take vacations during this time as well, but there is still plenty of work going on.

That said, I am so happy it is summer.

Unfortunately, I’ve had a little trouble with motivation. It’s hard to focus without the deadlines and the structure that the academic year brings. And as I try to get back into a rhythm with work, I’ve been trying to keep on top of meal planning and cooking healthy meals to feed my brain so I can actually accomplish things on my To Do List

source: Hyperbole and a Half

Now, I know that a pot pie may not *seem* like the ideal summer dish, and you’re not wrong. This is a great fall/winter dish as well, but the fact is, I was craving that pot pie goodness a couple of weeks ago (even if I’m only getting around to posting about it now) and I thought, why order from elsewhere what I could just make myself? I’d never made up a skillet pot pie recipe (or any pot pie recipe) before, but I thought I’d take a shot, and my roommate and I were both thrilled to see it pay off.

20180429_185522

I do want to note that even though this recipe does not include peas, you could choose to add peas to your own vegetarian pot pie and I’m sure it would work well. I am not a big fan of cooked English peas, especially in soups and pot pies, so I didn’t bother to include them in this recipe. (After all, what’s the point of making up recipes if I can’t make them be exactly what I want?) This recipe also includes some less conventional choices, like leeks and baby bella mushrooms, in addition to more traditional veggies like carrots, and I know that the combo may seem odd-~~-leeks? In a pot pie?-~~- but trust me, it’s worth it.

Like all pot pies, the key to this one is in the gravy. The delicious, totally vegetarian gravy. That’s right, veggie-loving friends, this recipe does not involve anything animal-based. From the veggies that make up the filling to the delightful vegetable broth-based sauce, this is a totally vegetarian-friendly pot pie. It’s also pretty healthy–sure, there’s some butter involved (how are you going to make a delicious, creamy filling without butter?) but overall? I wouldn’t throw this in your junk food recipe file.

So let’s talk briefly about the making of this gravy, because to be honest, even I thought the way I did it was a little bit of a gamble. I know you are probably going to look at the recipe and think, but wait, why would you cook the gravy in the pan with the vegetables. Please just trust me. And look at the pictures!!! After you have sauteed your veggies, you’re going to want to push them to one side. Then melt the butter and add the flour to make a ruox. Once your ruox is starting to thicken up a bit, add in your vegetable broth and your heavy cream and whisk it all together. Once they’re combined, you can let the gravy mix in with the vegetables. Cooking it all together helps the gravy get more flavor, which is absolutely what you want.

20180429_183338

Ok so now you’ve seen the pot pie and I know you are wondering, how do I MAKE the pot pie.?

Start with the leeks.

20180429_182051

As you can see from the above photo, you should also be cooking the lentils at the same time, otherwise they will not be ready when you need them! Once you have the leeks somewhat soft, start adding in your other vegetables (in this case, the carrots, and then after a couple of minutes, the mushrooms).

20180429_182523

Once your vegetables are getting soft and cooked together, push them all to one side so that you can start on the gravy. Don’t wait too long to do this or you’ll end up with really mushy vegetables, which isn’t really what you want.

Melt the butter, make the roux, add the vegetable broth and cream, and let simmer, stirring occasionally, until the gravy starts to thicken.

Stir in your lentils and spices cook for another minute or two.

Add on the biscuit dough, arranging the biscuits to cover as much of the pan as possible. Throw it in the oven and bake for 10-12 minutes, until the biscuits are golden brown on top.

20180429_185504

And there you go: your new favorite year-round pot-pie-in-a-skillet recipe. It’s comfort food without being horribly unhealthy. It’s fun without being too messy. It is high on my list of things that will be made again soon, and I hope you enjoy it as much as I did!

RECIPE

Ingredients

2 leeks, sliced (light and dark green parts only)

1/2 cup red lentils

1 cup sliced baby bella mushrooms

2 carrots, sliced

1 can pre-made biscuit dough (regular biscuits, not buttermilk or crescent rolls)

1 cup vegetable broth

1/3 cup heavy cream

2 T butter

2 T flour

garlic salt, to taste

1 tsp lemon pepper

1/2 to 3/4 tsp paprika

Directions

Cook the lentils according to cooking instructions on the packaging. Heat oven to 350 degrees.

While the lentils cook, heat a cast iron or other oven-friendly skillet over medium heat. Add just enough vegetable oil to coat the bottom.

Saute leeks over medium heat until they begin to soften. Add the carrots and cook, about  3 or 4 minutes. Add the mushrooms and cook 2-3 minutes, until they begin to soften.  If you are using peas, add them here as well.

Reduce heat to medium-low (if your stove gives a range of 1-10 with 5 being medium, reduce to 2-3). Push all of your vegetables to one side of the pan. Melt the butter and whisk in the flour until they combine to be a golden brown. Let simmer, stirring occasionally, until they form a roux. Add in the cream, stirring until combined. Add in the broth and then stir until the gravy mixture and the vegetables are combined.

Simmer (still at that 2 or 3 heat level) until gravy starts to thicken. Stir in your now-cooked lentils. Add your garlic salt, lemon pepper, and paprika. Stir until combined.

Remove pan from heat. Place the biscuits across the pan so that dough is evenly dispersed. Place the pan in the oven and bake, uncovered, 12-14 minutes until biscuits are golden-brown on top.


Homemade Veggie Pizza and a Desperate Need for Spring Break to Arrive

Oh wow, is it time for spring break to arrive.

Here’s what was on my To Do List when the week began: a fellowship application is due next week, my statistics paper is due at the end of the week, I needed to meet with a professor about my midterm paper, I need to grade 22 exams, and I needed to read and come up with discussion questions for a book. And that’s just the school stuff! I also had three doctors’ appointments scheduled and errands to run in advance of spring break. So needless to say, I’ve been a little stressed. And by “a little stressed” I mean I think I saw a gray hair appear on my head this week.

So far only two of those things are done: discussion questions and the fellowship application. One of my friends just spent an hour trying to get a margins command to run in Stata. I think I just yelled at a piece of fruit.

Spring break cannot get here soon enough.

Food-wise, this week required two things: easy meals, and comfort food. Hello, sheet pan shrimp fajitas and Crockpot Thai peanut chicken. And pizza. Oh yes, this week required pizza.

previous pizza
Pictured above: a previously made pizza

I love making pizza. It’s soothing–there’s something about kneading dough that just feels satisfying. Plus at the end you get carb-based cheesy goodness! What is not to like?

So let’s talk about what goes into this pizza: simple, no yeast crust, cheese, lots of vegetables, and Alfredo sauce. And eggs, if you like eggs on your pizza. This isn’t your traditional veggie pizza either.  Look, I know you might look at the ingredient list and think “Asparagus? On a pizza? Ridiculous!” But hear me out! Asparagus on pizza is DELICIOUS! (For further proof, check out Deb Perelman’s recipe for Shaved Asparagus Pizza.) And I know that Alfredo sauce is not your traditional pizza sauce, but it works so well with the vegetables that it’s absolutely worth it. So broaden your pizza horizons and let’s take a trip down pizza-baking lane, shall we?

pizza dough 1

First, let me say that the key to weeknight pizza-baking is this: you need a no-yeast dough. When I finally got home at 7pm, I didn’t have time to wait for the pizza dough to rise–which is why this quick, yeast-free version is PERFECT for quick pizza-making! After you combine the ingredients and knead it into a ball, just let it sit for a couple of minutes to let it fluff up just a bit and, more importantly, let it all become more cohesive.

pizza dough 2

Then comes the fun part: rolling out the dough and assembling the pizza. Keep in mind that homemade pizza basically never turns out to be the shape you want it to be. It just about always ends up being really weird, but it doesn’t matter because it will taste delicious no matter how not-round it looks.

Pizza assembly 101: the sauce goes on first, then the cheese. Then the toppings. Assemble all of that when it is already on your baking pan, to prevent it from getting messed up when you move it. Sauce, cheese, toppings.

Obviously, any combination of vegetables will work. You can also throw on meats like ham or bacon. IF YOU ARE PLANNING TO ADD EGGS, DO NOT ADD THEM YET. Please follow the special “eggs on a pizza” instructions below!!

pizza assembled

See? So colorful and healthy-looking! (There is no picture of the finished product; I got excited and just started eating before remembering to take a picture of it–oops!)

Happy pizza-making!

INGREDIENTS

For the dough:

1 1/3 cups flour

1/2 cup milk (I used 2% but any milk will work)

1 1/2 T olive oil, plus more to coat

1 tsp baking powder

pinch of salt

For the pizza toppings:

Alfredo sauce (I use store brand jarred Alfredo sauce)

1/2 cup shredded mozzarella cheese

1/4 cup shredded Parmesan cheese

1 cup cut asparagus*

1 1/2 cups sliced bell peppers, any colors*

1/2 cup baby bella mushrooms, chopped*

2 cloves of garlic, minced

Optional: 2 or 3 eggs**

Optional: 1/4-1/3 cup roughly chopped ham or bacon

*any vegetables will do, but I highly recommend trying asparagus on your pizza at least once. It works really well with this recipe, and with all of the optional/suggested toppings

**if you’re using eggs, and you’ve never put eggs on a pizza before, please please read the egg instructions

DIRECTIONS

Preheat your oven to 375 degrees Fahrenheit.

In a medium/large mixing bowl, combine all of the ingredients for the dough until you get a crumbly mixture. Meld the dough together with your hands and knead it 8 to 12 times, reforming it into a ball like the one seen in the third photo above. Coat in olive oil, then cover with a wet paper towel and let sit for 10 minutes.

Roll out the dough on a floured surface. Stretch it until it is relatively thin but even in thickness across. Transfer to an aluminum-foil covered baking sheet or pizza pan.

Spread Alfredo sauce onto the dough until it is covered, leaving about a half-inch margin around the edges. Sprinkle with the cheese and toss the vegetables across the pizza so that they are evenly distributed.

Bake the pizza for 12-14 minutes, until the crust is just starting to get golden-brown at the edges.

**INSTRUCTIONS FOR THE EGGS: If you would like to add eggs as a topping, when the pizza has been in the oven for about 9 minutes, pull it out and crack the eggs over the pizza, trying to have them run as little as possible. Carefully put the pizza back in the oven and bake for another 4-6 minutes, until the whites of the eggs have set.